20 2x4's? Holy smokes - the stand is going to be as heavy as the tank!
And what a tank. That looks like good fun, Keith.
Tank setup update
Moderator: LoachForumModerators
-
Mark in Vancouver
- Posts: 14252
- Joined: Wed Dec 28, 2005 12:41 pm
- Location: British Columbia
-
Keith Wolcott

- Posts: 720
- Joined: Sun Mar 04, 2007 1:49 pm
- Location: Charleston, Illinois USA
Yes Mark, it will be heavy.
The weather was nice yesterday and today and I had some time to work on the stand.
The jig below allowed me to cut all 56 corners off of the 2x4's in about 30 minutes. The board on the left is being cut and you just slide it forward each time to get identical cuts.
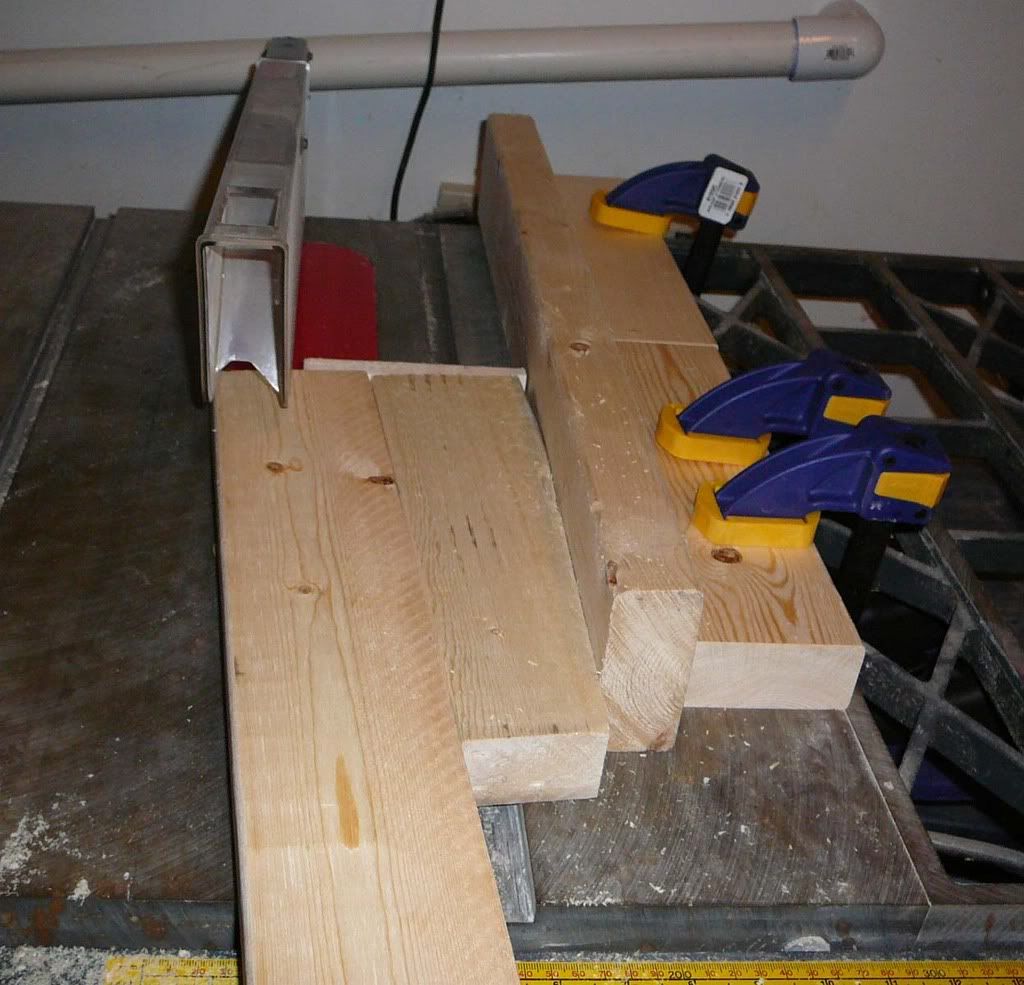
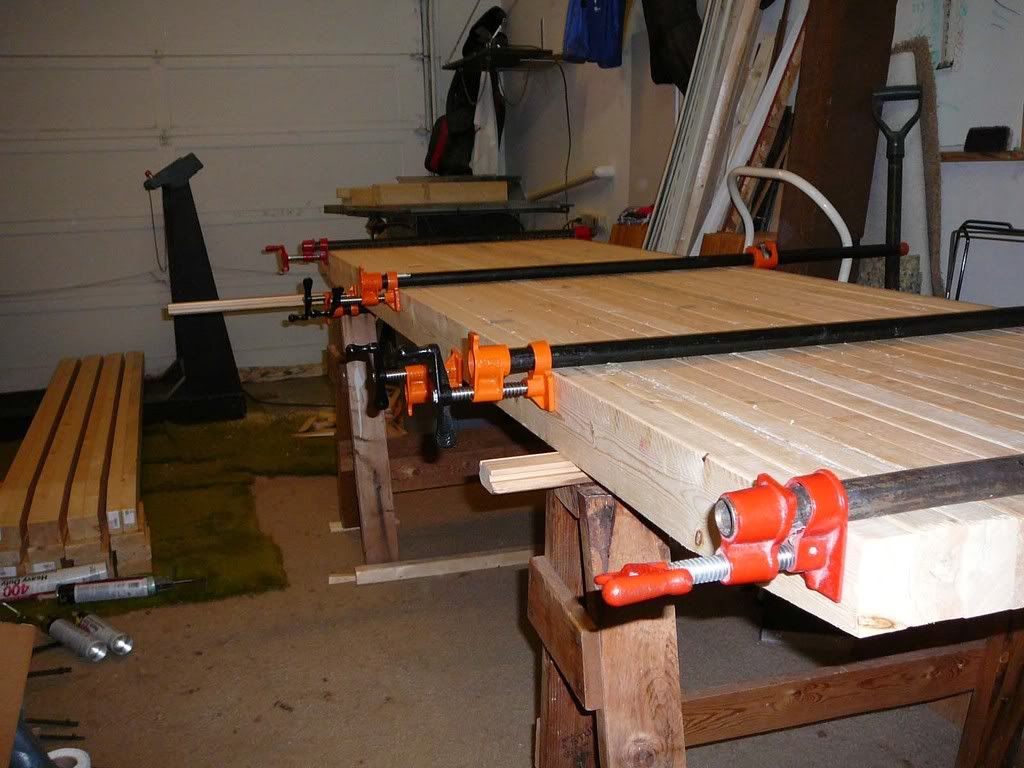
Gluing the top together went pretty well although as I would clamp it down the boards tended to slide one way or the other. Constant adjustment and tapping with a hammer kept it aligned. It is quite flat, which was the goal.
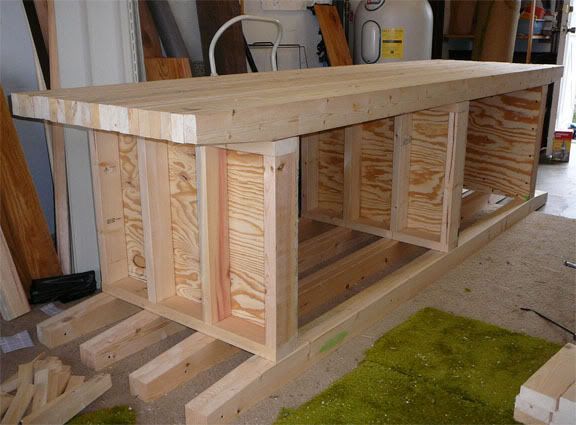
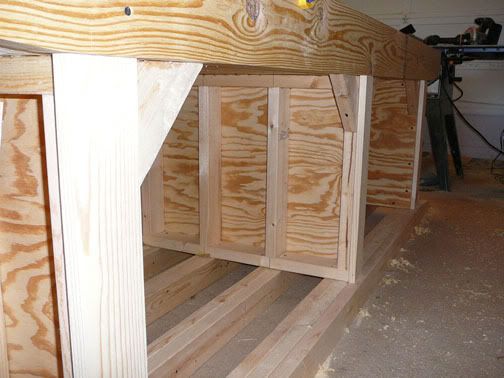
Today I built the three supports and have it sitting in place. I still have to attach it together and add plywood triangles for reinforcement. And then, of course, add the decorative sheathing.
The weather was nice yesterday and today and I had some time to work on the stand.
The jig below allowed me to cut all 56 corners off of the 2x4's in about 30 minutes. The board on the left is being cut and you just slide it forward each time to get identical cuts.
Gluing the top together went pretty well although as I would clamp it down the boards tended to slide one way or the other. Constant adjustment and tapping with a hammer kept it aligned. It is quite flat, which was the goal.
Today I built the three supports and have it sitting in place. I still have to attach it together and add plywood triangles for reinforcement. And then, of course, add the decorative sheathing.


Really nice work, Keith! That's some shop setup you've got there. Who you going to have over to move the thing or does it stay in the shop? 
books. gotta love em!
http://www.Apaperbackexchange.com
http://www.Apaperbackexchange.com
-
Graeme Robson

- Posts: 9096
- Joined: Wed Dec 28, 2005 4:34 am
- Location: Peterborough, UK
- Contact:


-
Keith Wolcott
- Posts: 720
- Joined: Sun Mar 04, 2007 1:49 pm
- Location: Charleston, Illinois USA
-
Keith Wolcott
- Posts: 720
- Joined: Sun Mar 04, 2007 1:49 pm
- Location: Charleston, Illinois USA
I managed to work on the stand quite a bit this weekend.
The support structure is done.
The four doors are glued and screwed together.

The sheathing on the end.
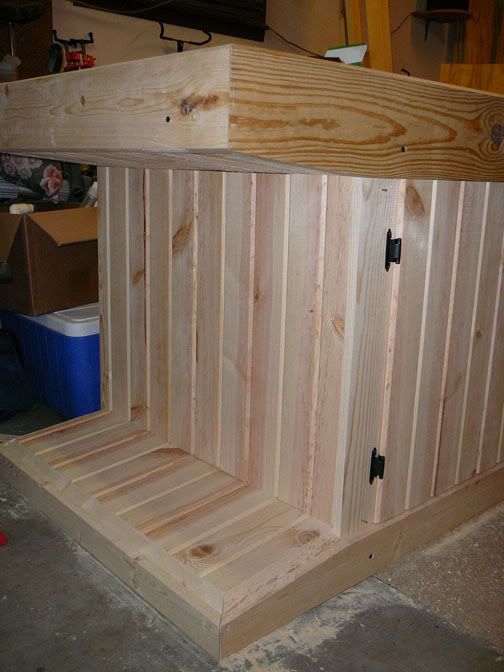
The garage is tight, so I can't get a view from the front, but this shows what it looks like.
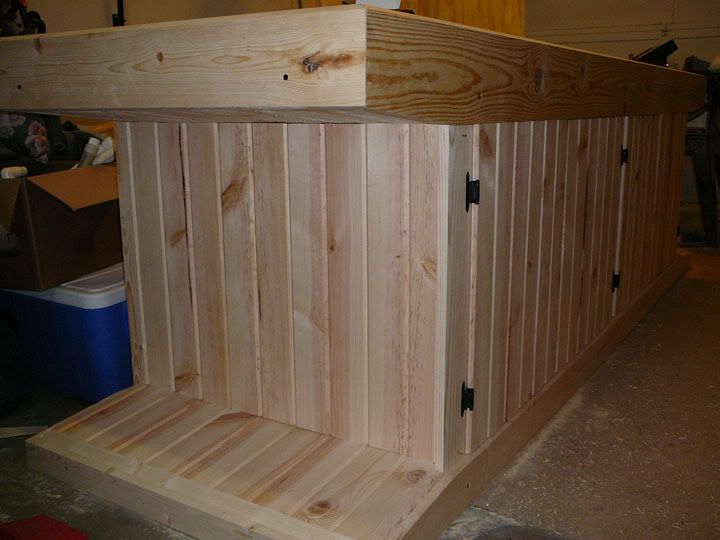
I still have to do some sanding here and there and I'll have to wait for a warm spell to stain it.
The support structure is done.
The four doors are glued and screwed together.
The sheathing on the end.
The garage is tight, so I can't get a view from the front, but this shows what it looks like.
I still have to do some sanding here and there and I'll have to wait for a warm spell to stain it.
~sigh~
It's beautiful already, Kieth. Are you going to stain it or polyurethane?
It's beautiful already, Kieth. Are you going to stain it or polyurethane?
books. gotta love em!
http://www.Apaperbackexchange.com
http://www.Apaperbackexchange.com
-
Keith Wolcott
- Posts: 720
- Joined: Sun Mar 04, 2007 1:49 pm
- Location: Charleston, Illinois USA
Thanks chefkeith and Shari. I have not thought too much about the finish yet, but for past furniture that I have built, I have stained it and then put a polyurethane protective finish on. This has worked well in the past, but if you have ideas on the best way to do this please share.
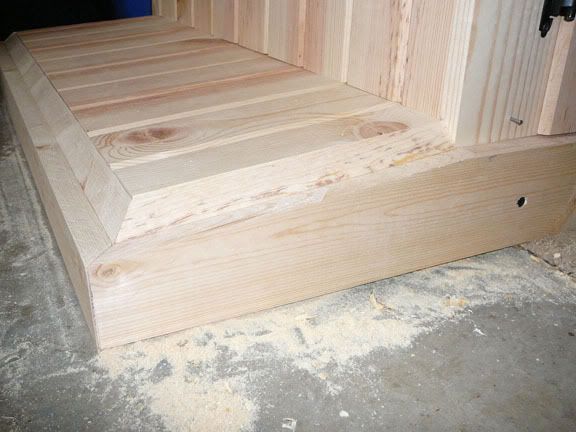
I forgot to say that I varied the plans a bit in that I used 2 inch thick boards for the trim across the top and bottom rather than 1 inch boards. These stick out further than the doors so that it does not look so flat on the front. The top 2x8 (trimmed down to 6.25") that goes around the aquarium is flat on its top for 1/4" on the inside and then slopes down at 20 degrees. This means that I cannot set things on the edge but I like it more shapely. I also went with hinges that give an overlap (on the hinge edge) and half inset the doors. This also gives the front a more 3d look.
For the sheathing on top of the ends of the base, I could not decide among about 4 different ways to do it. From the front I wanted the top and bottom long pieces to dominate and did not like the idea of the sheathing on top of the ends of the base ruining the lines of these front pieces. I ended up using my wife's idea which insets the sheathing and bevels up to it at 45 degrees. Here is a close up picture. Because of all of the angled cuts, I got tired of changing the angle on the table saw between 0, 6, 20, and 45 degrees. Everything went smoothly until yesterday when I was trying to get one last small 10" board (the 45 degree slope on the front of the sheathing in the picture) cut before lunch. Three sides were beveled at different angles and after cutting it too small twice, I gave up and did it correctly after lunch.
-
Mark in Vancouver
- Posts: 14252
- Joined: Wed Dec 28, 2005 12:41 pm
- Location: British Columbia
-
crazy loaches

- Posts: 708
- Joined: Thu Sep 28, 2006 7:12 am
- Location: Gahanna, Ohio
- Contact:
Very nice!
I think your stand is going to be heavier than mine! Well at least with the stand its not going to shatter if you accidentally drop it going into the house... not so sure about the floor though lol. (BTW I know someone who recently dropped a new custom built starphire tank on its move into the house - think it was 180g). I designed mine to come apart so I could move it easily by myself, but this added a lot of unnecessary complexity and wasted space to the design.
I think your stand is going to be heavier than mine! Well at least with the stand its not going to shatter if you accidentally drop it going into the house... not so sure about the floor though lol. (BTW I know someone who recently dropped a new custom built starphire tank on its move into the house - think it was 180g). I designed mine to come apart so I could move it easily by myself, but this added a lot of unnecessary complexity and wasted space to the design.
-
Keith Wolcott
- Posts: 720
- Joined: Sun Mar 04, 2007 1:49 pm
- Location: Charleston, Illinois USA
Thanks Mark and Tristan.
Mark- I measured carefully long ago, and it will fit through the front door and into the living room. The difficult part is going to be handling the weight, but I will move it without the doors and sheathing so it won't be too bad.
Tristan- Dropping the aquarium has got to be a disaster. So many things can go wrong on these projects, but I like working out all of the details. You obviously do to with your system which is going to be quite a bit more complex than mine.
-
crazy loaches
- Posts: 708
- Joined: Thu Sep 28, 2006 7:12 am
- Location: Gahanna, Ohio
- Contact:
For the stand, if you cant get enough folks to help the move, you could get some wheeled cart/dolleys (sorry unsure of the exact name) designed for weight. All youd have to do is tip up one end and slide it under, then the other end. of course that only works well if its all flat and no stairs  . it might be a good idea to put some cheap plywood or hardboard along the edges just incase you were to brush the door frame or something as you went in... Moving the tank is up to you... bad things happen when you break so I dont want to be liable giving any advise lol! I took a huge gamble with mine and luckily nothing bad happened.
I must say again I do really like that stand design, its a bit more out of the norm. If I were ever to build another I'd be keeping yours in mind. Cant wait to see it all finished.
I must say again I do really like that stand design, its a bit more out of the norm. If I were ever to build another I'd be keeping yours in mind. Cant wait to see it all finished.